If you are developing Spring boot/Java application for Kubernetes, you will find out that testing and debugging the application during the daily local development is very complex and time consuming, since you have to keep doing
- Build the application through the build tool
- Build the docker image from docker terminal or build tool
- Push the container image to a docker registry
- Create/Refresh the Kubernetes’ objects with rolling deployment updates
But today we will cover how we can do that in a robust almost automated way to give the same old web typical web application development experience and you will end up feeling it is the same at the end .
we are going to show how to make your developer experience more manageable through the usage of the following:
- Google Skaffold https://github.com/ktarplee/skaffold
- Google Jib https://github.com/GoogleContainerTools/jib
- Cloud code plugin for IDEA https://cloud.google.com/code/
- Helm charts https://github.com/helm/charts
- Minikube (Single node Kubernetes cluster for local development) https://kubernetes.io/docs/setup/learning-environment/minikube/
We will have a simple spring boot web application which we will deploy in Kubernetes with service exposing to be able to access it from outside the cluster.
Skaffold will make your development local cycle as the following flow from Skaffold repo :

We will cover the local development flow only but as you see from the diagram , it can be go further and be part of your continuous development/deployment
Now we will show what is needed to be done with the simple spring boot application to have that enabled , all the code is in github repo which is a custom fork from the a nice example created by https://github.com/Pozo
Using Jib for docker image creation :
We use Jib maven or gradle plugin to automate the docker image creation with the customization options enabled as well , Jib has a benefit that does not requite docker daemon to be running in your local machine to work neither having docker file for your spring boot application.
Maven configuration for Jib plugin will look like the following:
         <plugin>
                <groupId>com.google.cloud.tools</groupId>
                <artifactId>jib-maven-plugin</artifactId>
                <version>${jib-maven-plugin.version}</version>
                <configuration>
                    <to>
                        <image>com.github.main/spring-boot-jib:${maven.build.timestamp}</image>
                    </to>
                    <container>
                        <ports>
                            <port>55000</port>
                            <port>5005</port>
                        </ports>
                        <jvmFlags>
                            <jvmFlag>-agentlib:jdwp=transport=dt_socket,server=y,address=5005,suspend=n,quiet=y
                            </jvmFlag>
                        </jvmFlags>
                    </container>
                </configuration>
            </plugin>
- In the maven plugin , we define the container port plus the debug port we want to use in ports.port section
- We pass also the remote debugger JVM configuration in jvmFlags section so we can attach remote debugger to the target container
Now to build your container image we have two options. Using jib task which pushes a container image for your application to a container registry, or jibDockerBuild which uses the docker command line tool and requires that you have docker available on your PATH or you can set the executable location via the dockerClient object.
Kubernetes deployment manifest :
Now in kubernets folder of the spring boot application will contains the pod deployment and service deployment manifest :
apiVersion: apps/v1
kind: Deployment
metadata:
  name: spring-boot-jib
spec:
  replicas: 1
  selector:
    matchLabels:
      app: spring-boot-jib
  template:
    metadata:
      labels:
        app: spring-boot-jib
    spec:
      containers:
        - name: spring-boot-jib-pod
          image: com.github.main/spring-boot-jib
          ports:
            - containerPort: 55000
---
apiVersion: v1
kind: Service
metadata:
  name: spring-boot-jib-service
spec:
  type: LoadBalancer
  selector:
    app: spring-boot-jib
  ports:
    - name: http
      port: 80
      targetPort: 55000
Skaffold in play :
First of all we need an up and running Kubernetes cluster. we have several options like Minikube which runs a single-node Kubernetes cluster inside a VM on your laptop.
Or Docker for Desktop Kubernetes. It runs a single-node cluster locally within your Docker instance.
We will use Minibike for this tutorial , so after installing Minikube in your machine , you can start it via:
minikube startthen open it is dashboard so you can have visual UI of your cluster , you can have a similar visual through cloud code plugin , we will cover that later in the post !
minikube dashboardNow Skaffold come to play , we will create Skaffold pipeline file as the following :
apiVersion: skaffold/v2alpha1
kind: Config
metadata:
  name: continuous-java-kubernetes
build:
  local:
    push: false
  artifacts:
    - image: com.github.main/spring-boot-jib
      jib:
        type: maven
      context: .
deploy:
  kubectl:
    manifests:
    - kubernetes/spring-boot-jib.yaml
Which define the following :
- The
build.local.push: falseenforces Skaffold to usejibDockerBuild. - The
build.artifactsis a list of the actual images we’re going to be build. - The
build.artifacts.jibconfigures Skaffold to use Jib during the image building phase, with type maven as we are using maven as a build tool - The
deploy.kubectl.manifestsvalue set the folder name where we already have our kubernetes manifest files. If we skip this the default directory name would bek8s.
Now it is time to execute the dev mode of the Skaffold which will build the application , create the image and deploy in your local cluster and keep watching your sources to see if there is a change , it will do the same flow again upon code change so you can have a fresh deployment for testing and debugging !
skaffold dev --trigger notify -v debugNow after the it is being deployed , get current deployed services where you should see your load balancer by executing :
kubectl get services
Which will list your load balancer, then in your terminal , type minikube ip to get the host IP which allow you to access the load balancer with URL pattern minikubeIp:30639 which will call default rest API with hello string response

Helm charts to play :
you can check more about Helm charts , it is optional to use it and up to the team to decide the proper tooling for their needs , Helm charts help in creating usable deployments with proper templating in place.
Create a helm chart for our application with
helm create spring-boot-jib
The helm’s create command will generate a directory structure with several files. In order to make it cleaner what do we have in this folder, rename it to helm. The most important files are in the templates directory and the values.yaml itself.
Change the generated service.yaml‘s spec.ports.targetPort to
targetPort: {{ .Values.service.containerPort }}
The deployment.yaml‘s spec.template.spec.containers.image value to
image: "{{ .Values.image.repository }}{{ if .Values.image.tag }}:{{ .Values.image.tag }}{{ end }}"
And the deployment.yaml‘s spec.template.spec.containers.ports value to
ports:
  {{- toYaml .Values.container.ports | nindent 12 }}
Everything between {{ }} came from the values.yaml or _helper.tpl files. In fact we are using Go templating. And change the values.yaml file like this:
# Default values for helm.
# This is a YAML-formatted file.
# Declare variables to be passed into your templates.

replicaCount: 1

image:
  repository: com.github.main/spring-boot-jib
  tag: latest
  pullPolicy: IfNotPresent

nameOverride: ""
fullnameOverride: "spring-boot-jib"
imagePullSecrets: []

service:
  type: LoadBalancer
  port: 9999
  containerPort: 55000

container:
  ports:
    - name: http
      containerPort: 55000
      protocol: TCP
    - name: debug
      containerPort: 5005
      protocol: TCP

serviceAccount:
  # Specifies whether a service account should be created
  create: false
  # The name of the service account to use.
  # If not set and create is true, a name is generated using the fullname template
  name:

podSecurityContext: {}
  # fsGroup: 2000

securityContext: {}
  # capabilities:
  #   drop:
  #   - ALL
  # readOnlyRootFilesystem: true
  # runAsNonRoot: true
  # runAsUser: 1000

ingress:
  enabled: false
  annotations: {}
    # kubernetes.io/ingress.class: nginx
    # kubernetes.io/tls-acme: "true"
  hosts:
    - host: chart-example.local
      paths: []
  tls: []
  #  - secretName: chart-example-tls
  #    hosts:
  #      - chart-example.local

resources: {}
  # We usually recommend not to specify default resources and to leave this as a conscious
  # choice for the user. This also increases chances charts run on environments with little
  # resources, such as Minikube. If you do want to specify resources, uncomment the following
  # lines, adjust them as necessary, and remove the curly braces after 'resources:'.
  # limits:
  #   cpu: 100m
  #   memory: 128Mi
  # requests:
  #   cpu: 100m
  #   memory: 128Mi

nodeSelector: {}

tolerations: []

affinity: {}
Now we need to switch to Helm instead of Kubtec to deploy our applciation using Helm charts so we need to adjust the Skaffold pipeline to use Helm instead for deployment as the following :
apiVersion: skaffold/v2alpha1
kind: Config
metadata:
  name: continuous-java-kubernetes
build:
  local:
    push: false
  artifacts:
    - image: com.github.main/spring-boot-jib
      jib:
        type: maven
      context: .
deploy:
  kubeContext: minikube
  helm:
    releases:
      - name: spring-boot-jib
        chartPath: helm
        values:
          image.repository: com.github.main/spring-boot-jib
        setValues:
          image.tag: ""
    flags:
      upgrade:
        - "--install"
As we a are using Helm 3 which is not yet officially supported by latest Skaffold , there is a small workaround by enabling –install in the flags section as being explained here:
https://github.com/GoogleContainerTools/skaffold/issues/2142
We must configure the chartPath, the image.repository, and we must set image.tag value to empty string for Helm, so Skaffold will be able to manage custom tags on the deployment.
If everything set, run and it will deploy the application in the same life cycle.
skaffold dev --trigger notify -v debug
Live debugging
During the development It’s a normal demand to setup a breakpoint and check the application’s state while It’s running. So how to enable the same for an application running in a Kubernetes cluster ? actually we can enable that by updating the Jib maven plugin with :
- Add
5005to the list of port under the jib configuration in thepom.xml - Add the
agentlibrelated configuration inside ofjvmFlagsproperty
- Extend
values.yaml‘scontainer.portswith
- name: debug
  containerPort: 5005
  protocol: TCP
- Create a remote configuration for the debugger
Then run the Skaffold pipeline again. Skaffold will automatically forward every listed ports, however be careful, after a change Skaffold might pick a random port if the requested one isn’t available. Set a breakpoint, and run the previously created Remote configuration, call the corresponding endpoint and that is it .
Cloud code plugin in play :
If you are IDEA guy more than terminal guy , Google Cloud code plugin is here to help https://cloud.google.com/code/ , which help with local Kubernetes application development / debugging / deployment with nice IDEA support and visualization of your local cluster .
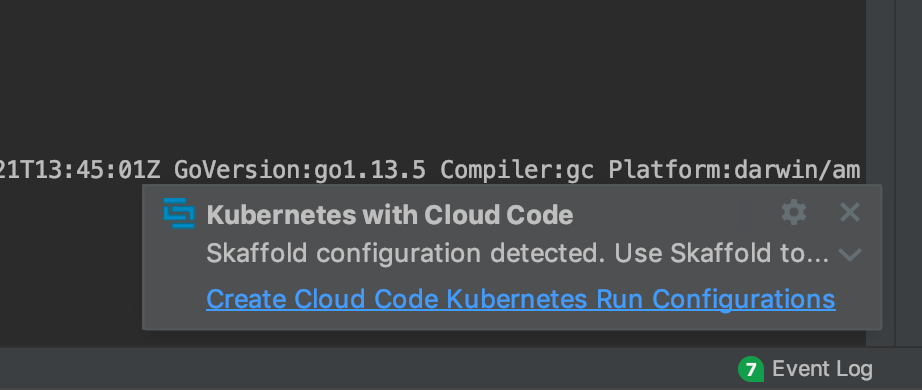
So after installing the intellij plugin and opening the same sample application , IDEA will discover that you have Skaffold and Kubernetes configuration and will suggest to add the Cloud code Kubernetes run configuration for you , you click create :
you will see now you have 2 configuration , Develop and Run , Develop for hod code reload and redeploy when there is change , and Run is for just Run.
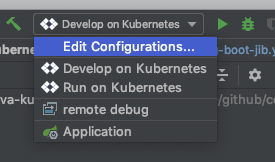
When you edit the Develop configuration , you will see the different options you have for how to configure and off-couse you can set your local Skaffold and Kubect binaries through plugin preferences :

So on you have the same one button experience as you run locally a spring boot application with all complexities of the cluster deployment abstracted for you , Happy coding !
References :
